By Norman R.
Painting your ceiling with little to no mess is possible for homeowners across the U.S. when you use the right prep, tools, paint, and rolling technique. The clear answer: protect the room before you open the can, use a ceiling-specific roller setup, work in small sections, and control drips by loading the roller correctly instead of over-saturating it. Whether you are updating a flat ceiling in a newer suburban home, refreshing a textured ceiling in an older house, or repainting after seasonal humidity stains, a cleaner ceiling paint job comes down to preparation and steady technique.
Quick Reference: How to Paint a Ceiling With Less Mess
- Cover everything first: Use canvas drop cloths on floors and lightweight plastic over furniture, lights, fans, and built-ins.
- Use the right roller: A ?-inch nap works well for smooth ceilings; ½-inch to ¾-inch nap is better for light texture.
- Do not overload the roller: Dip, roll off excess paint, and keep the roller damp, not dripping.
- Cut in before rolling: Paint the ceiling edges and corners first so you can roll into a wet edge.
- Work in small sections: Roll in 3-by-3-foot or 4-by-4-foot areas to avoid lap marks, splatter, and uneven coverage.
Why Ceiling Painting Gets Messy
Ceiling painting is different from painting walls because gravity works against you the entire time. Paint can drip from the roller, mist off the roller cover, run down the handle, or splatter when you move too quickly. The higher the ceiling, the more likely you are to overreach, press too hard, or load the roller with too much paint.
In many U.S. homes, ceiling surfaces also vary by region and age. Newer homes often have smooth drywall ceilings that show roller marks easily. Older homes may have plaster, popcorn texture, knockdown texture, or multiple layers of aged ceiling paint. In humid regions, bathroom and kitchen ceilings may have mildew staining or moisture discoloration. In colder climates, winter heating can dry out joint compound and open hairline cracks near seams.
A low-mess ceiling paint job starts by matching the method to the room, the ceiling material, and the season.
For full-room repainting, it often makes sense to pair ceiling work with professional [interior painting services] so walls, trim, doors, and ceilings are finished in the right order.
Steps
Step 1: Clear and Cover the Room
The easiest mess to clean is the mess you never make. Before painting a ceiling, remove as much as possible from the room. Take down wall art, move lamps, remove small furniture, and clear shelves. Large furniture can stay, but move it to the center of the room and cover it completely.
Use canvas drop cloths on the floor because they stay in place better than thin plastic. Plastic works well for furniture, shelving, countertops, and built-ins, but it can be slippery underfoot. If you use plastic on floors, tape the edges down and avoid walking on wrinkled areas.
Cover ceiling fans, recessed lights, pendant lights, smoke detectors, vents, and window treatments. Remove fixture covers if safe to do so. If you are unsure how to handle electrical fixtures, leave them in place, turn off power where appropriate, and tape carefully around them.
Pro tip: Do not rely on one big drop cloth in the middle of the room. Ceiling paint splatter usually lands in a wide radius, especially when rolling near corners. Professional painters overlap floor protection by at least 6 inches and tape seams in high-traffic areas so paint cannot seep between cloths or plastic.
Step 2: Inspect the Ceiling Before You Paint
A ceiling that looks fine from the floor can reveal problems once you are under good lighting. Look for cracks, stains, peeling paint, popped drywall fasteners, tape seams, water rings, mildew spots, and texture damage.
Common ceiling issues include:
- Brown water stains from old roof, plumbing, or HVAC leaks.
- Yellowing around kitchens from cooking residue.
- Mildew or dark spotting in bathrooms with poor ventilation.
- Hairline cracks near drywall seams.
- Peeling paint near exterior walls or attic spaces.
- Dust and cobweb buildup around vents and ceiling fans.
If the ceiling has water stains, do not paint over them with standard ceiling paint. The stain can bleed through the new coat. Use a stain-blocking primer first after confirming the moisture source has been fixed. For persistent stains, smoke damage, or peeling surfaces, professional drywall repair and painting may be the cleaner and longer-lasting solution.
Homes built before 1978 may contain lead-based paint. The EPA notes that the federal government banned consumer lead-based paint in 1978, and its Renovation, Repair and Painting program covers work that disturbs painted surfaces in pre-1978 homes, child care facilities, and preschools.
Pro tip: If the ceiling is older and has unknown coatings, avoid sanding, scraping, or disturbing texture until you understand what is on the surface. Popcorn ceilings, old plaster coatings, and pre-1978 paint can require special testing and containment. Low-mess painting should never turn into unsafe dust generation.
Step 3: Clean the Ceiling
Paint sticks best to a clean, dry ceiling. Dust, cooking film, nicotine residue, bathroom moisture, and airborne particles can keep paint from bonding evenly.
For most bedrooms, living rooms, and hallways, use a microfiber duster or vacuum attachment to remove dust and cobwebs. For kitchens, laundry rooms, and bathrooms, wipe the ceiling with a lightly damp sponge and a mild cleaner. Do not soak the surface. Let the ceiling dry fully before priming or painting.
This step matters more in some parts of the country than others. In warm, humid regions, ceilings near bathrooms, laundry rooms, and kitchens collect moisture faster. In dry western climates, dust can build up quickly around ceiling fans and HVAC registers. In northern homes during winter, forced-air heating can leave fine dust patterns around vents.
EPA guidance on indoor air quality identifies paints, paint strippers, solvents, cleansers, and other household products as sources of volatile organic compounds, or VOCs, which is one reason ventilation matters during interior painting.
Step 4: Tape the Room Carefully
Painter’s tape helps keep edges clean, but it is not a substitute for a steady hand. Use tape along crown molding, cabinet tops, beams, skylight trim, and any fixture edges that cannot be removed.
If you are painting only the ceiling and not the walls, tape the top edge of the wall where it meets the ceiling. For the cleanest line, use a high-quality painter’s tape and press it firmly with a putty knife. Remove tape while the paint is still slightly soft, not days later after it has fully cured.
If walls will also be painted, paint the ceiling first. This allows small ceiling paint marks on the wall to be covered later. A complete project plan through whole-home painting can reduce rework because ceilings, walls, trim, and touch-ups are done in the correct sequence.
Pro tip: When taping textured walls or uneven crown molding, run a very thin bead of clear paintable caulk or the existing wall color along the tape edge before painting the ceiling color. This seals small gaps under the tape and helps prevent ceiling paint from bleeding onto the wall. Use a minimal amount; the goal is a sealed edge, not a visible caulk line.
Step 5: Choose the Right Ceiling Paint
Flat ceiling paint is the standard choice because it hides small imperfections and reduces glare. Most ceilings look best with a true flat or matte finish. Eggshell or satin can work in bathrooms, kitchens, and laundry rooms where extra wipeability is needed, but shinier paint will reveal roller marks, drywall seams, and patches more easily.
For white ceilings, choose a ceiling white that complements the wall color. A bright white ceiling can make a room feel taller and cleaner, while a softer white may work better with warm wall colors, older trim, or natural wood.
In coastal, humid, or high-moisture U.S. service areas, moisture-resistant paint can be a smart choice for bathrooms and laundry rooms. In older Northeast and Midwest housing stock with plaster ceilings, breathable primers and careful patching may matter more than using the thickest possible paint. In newer Sun Belt homes with large open-plan ceilings, consistency and sheen control are especially important because natural light can reveal every lap mark.
For paint finish selection across rooms, see our Spoke blog on how to choose the best interior paint finish.
Step 6: Use Low-Mess Ceiling Painting Tools
The right tools make ceiling painting cleaner, faster, and safer.
You will need:
- Ceiling paint.
- Primer, if needed.
- Angled sash brush.
- Roller frame.
- Extension pole.
- Roller covers.
- Paint tray or roller bucket with grid.
- Drop cloths.
- Painter’s tape.
- Small pail for cutting in.
- Damp rags.
- Ladder, if needed.
The roller cover matters most. For smooth drywall ceilings, use a ?-inch nap roller. For lightly textured ceilings, use a ½-inch nap. For heavier texture, use ¾-inch or more, but be careful: longer nap rollers hold more paint and can create more splatter if overloaded.
Avoid the cheapest roller covers. Low-quality covers shed lint, leave fibers in the finish, and throw more paint as they spin. A good roller cover holds paint evenly and releases it smoothly.
A roller bucket with a metal grid often creates less mess than a shallow tray because it is harder to step in, easier to move, and better for loading the roller evenly.
Step 7: Cut In Around Edges First
“Cutting in” means painting the edges and corners with a brush before rolling the main ceiling area. Use an angled brush and a small amount of paint. Start around the perimeter of the ceiling, then brush around fixtures, vents, beams, skylights, and ceiling medallions.
Keep the cut line about 2 to 3 inches wide. Do not brush too far into the ceiling field because brushed areas can dry with a different texture than rolled areas.
To avoid visible borders, roll into the cut-in area while it is still wet. This is called maintaining a wet edge. It helps the brushed and rolled paint blend together.
For more room-prep advice, see our Spoke blog on how to prep a room before painting.
Step 8: Load the Roller Without Drips
This is where most ceiling mess begins. A roller should be evenly loaded, not dripping.
Dip the roller about halfway into the paint. Roll it against the tray slope or bucket grid until paint is distributed around the cover. The roller should look full but not saggy. If paint drips from the roller before it reaches the ceiling, it is overloaded.
Start rolling a few inches away from the edge rather than directly at the wall line. This prevents excess paint from being pushed into corners or onto trim.
Pro tip: Before lifting the roller overhead, make two light passes on the tray ramp or bucket grid with almost no pressure. This removes surface-heavy paint while keeping the core of the roller damp. Professionals call this controlling the “load.” It is one of the biggest differences between a clean ceiling job and a splattery one.
Step 9: Roll the Ceiling in Small Sections
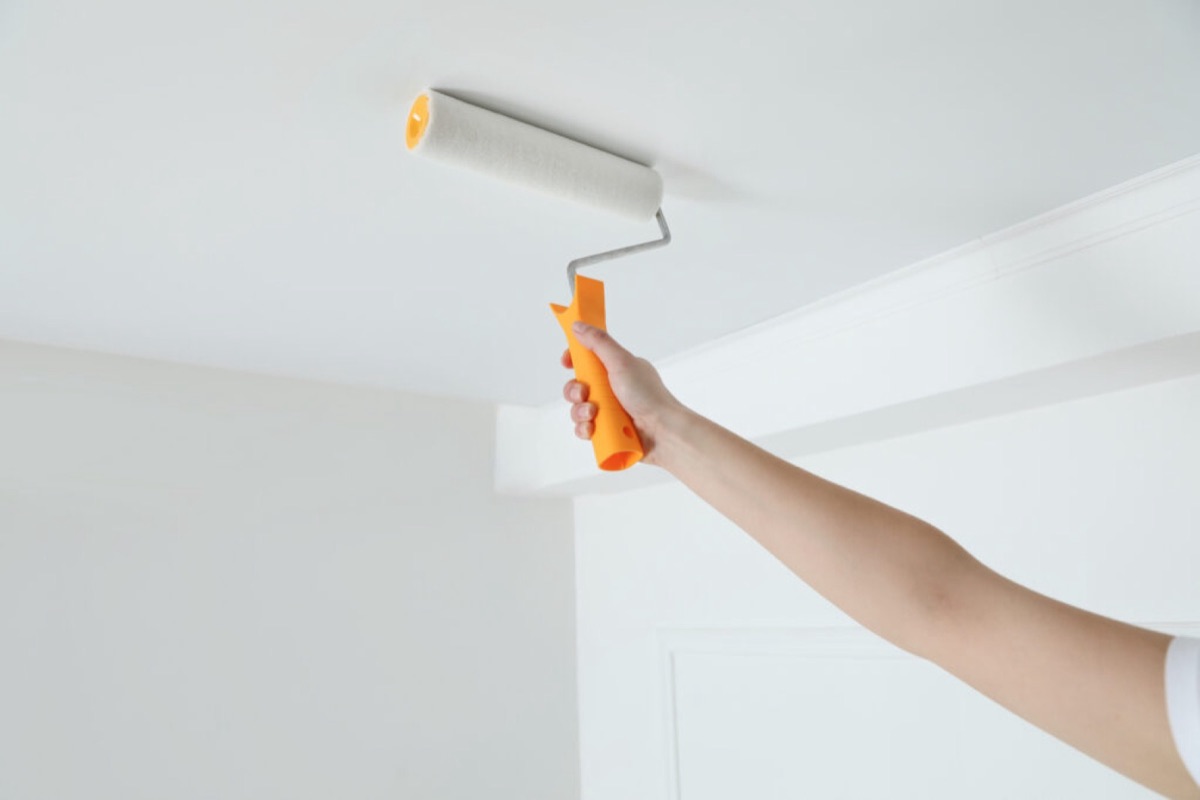
Work in small sections, usually about 3 by 3 feet or 4 by 4 feet. Use overlapping passes and avoid pressing hard. The roller should glide across the ceiling. If you have to push to get coverage, reload the roller.
Use a consistent pattern. Many painters use a “W” or “M” shape to distribute paint, then fill in the section with parallel passes. Finish each section with light strokes in the same direction. This final pass helps even out the texture.
Keep moving across the ceiling while the edge of each section is still wet. If one section dries before the next section meets it, lap marks can appear.
In rooms with strong natural light, such as open-plan living areas or vaulted ceilings, roll perpendicular to the main light source when possible and finish with consistent directional passes. This reduces the chance of visible roller lines.
Step 10: Control Splatter While You Paint
A nearly mess-free ceiling paint job depends on body position, roller speed, and pressure.
Keep the roller close enough to control, but not so close that paint drips onto your hands or face. Use an extension pole instead of constantly climbing up and down a ladder. Move slowly. Fast rolling creates paint mist and splatter.
Do not roll directly over your head for long stretches. Stand slightly to the side of the area you are painting so minor drips fall away from you. Keep a damp rag in your pocket for quick cleanup.
If you are using a ladder, set it on a stable, dry surface and avoid reaching too far. The U.S. Consumer Product Safety Commission works on reducing risks associated with consumer products, including fall hazards, and regularly posts ladder-related safety recalls and warnings.
For tall foyers, stairwells, vaulted ceilings, or rooms with complex trim, hiring professional [ceiling painting services] is often safer and cleaner than balancing on ladders with a loaded roller.
Step 11: Apply a Second Coat if Needed
Many ceilings need two coats, especially if you are covering stains, changing color, painting over glossy areas, or refreshing a ceiling that has not been painted in years.
Let the first coat dry according to the paint manufacturer’s instructions. Dry time depends on temperature, humidity, airflow, paint thickness, and surface porosity. In humid summer conditions, ceilings can take longer to dry. In winter, heated indoor air may dry the surface quickly but still leave deeper layers soft.
Apply the second coat using the same method as the first. Do not try to fix a half-dry area by rolling back into it aggressively. That can lift paint, create texture marks, or make the sheen uneven.
Step 12: Clean Up Before Paint Fully Hardens
Remove painter’s tape while the paint is slightly soft. Pull tape back at a 45-degree angle for a cleaner line. Check the floor protection before moving it. If paint splattered onto plastic or canvas, fold the dirty side inward.
Clean brushes and rollers according to the paint type. Most interior ceiling paints are water-based and clean up with soap and water, but always check the label.
Walk the room with a flashlight or work light and inspect the ceiling from different angles. Touch up thin spots only after the paint dries. Wet paint can look patchy even when coverage is fine.
Common Mistakes That Make Ceiling Painting Messy
The biggest mistake is skipping prep. Even careful painters create some splatter, and unprotected floors or furniture can turn a simple project into hours of cleanup.
Another common mistake is using too much paint. A dripping roller does not cover better; it just makes the job messier. Pressing harder also does not improve coverage. It pushes paint out of the roller unevenly and creates lines.
Painting in poor lighting is another problem. Ceilings can look evenly coated from one angle and streaky from another. Use a portable work light so you can see wet edges, missed areas, and roller marks.
Finally, do not ignore surface problems. Painting over dust, stains, mildew, or peeling paint will not create a clean long-term finish. It may look acceptable for a few weeks, then stain, bubble, or peel.
Final Tips for a Cleaner Ceiling Paint Job
Painting your ceiling with little to no mess is not about rushing. It is about controlling every step: protect the room, clean the ceiling, choose the right roller, load paint carefully, roll slowly, and maintain a wet edge.
Here is the simple formula:
Prep more than you think you need to. Use less paint on the roller than your instincts suggest. Roll slower than you want to. Keep the room ventilated. Inspect the ceiling before cleanup.
For a smooth, low-splatter, professional-looking ceiling, schedule interior painting services or request help with ceiling painting. A trained crew can handle prep, protection, repairs, priming, painting, and cleanup so your room looks refreshed without the mess.
FAQs
What is the least messy way to paint a ceiling?
The least messy way to paint a ceiling is to cover the entire room, use a quality roller cover, load the roller lightly, and roll slowly in small sections. An extension pole helps you stay in control and reduces the need to climb, reach, or tilt a loaded roller over your head.
How do I stop ceiling paint from dripping?
To stop ceiling paint from dripping, avoid overloading the roller. Dip only part of the roller into the paint, roll off excess on a tray ramp or bucket grid, and make sure the roller is damp rather than saturated. If paint drips before the roller touches the ceiling, there is too much paint on it.
What roller is best for painting ceilings without splatter?
For smooth ceilings, a ?-inch nap roller is usually best. For lightly textured ceilings, use a ½-inch nap roller. For heavier texture, use a ¾-inch nap roller, but load it carefully because thicker roller covers hold more paint and can splatter more easily.
Should I paint the ceiling or walls first?
Paint the ceiling first. Ceiling painting can create small splatters or edge marks on the walls. If you paint the ceiling first, those marks can be covered when the walls are painted later. The usual order is ceiling, walls, trim, then final touch-ups.
Can I paint a ceiling without removing furniture?
Yes, you can paint a ceiling without removing all furniture, but the job will be cleaner if you move as much as possible out of the room. Push large furniture to the center, cover it with plastic, and use canvas drop cloths across the floor.
Do I need primer before painting a ceiling?
You need primer if the ceiling has stains, patched drywall, bare drywall, peeling areas, smoke discoloration, water marks, or a major color change. Clean, previously painted ceilings in good condition may not need primer if you are using a similar color and quality ceiling paint.
How many coats of paint does a ceiling need?
Most ceilings need one to two coats. One coat may work for a clean white ceiling being refreshed with the same color. Two coats are better for stained ceilings, old paint, patched areas, darker colors, or uneven surfaces.
How long should ceiling paint dry before a second coat?
Dry time depends on the paint, humidity, temperature, airflow, and ceiling surface. Always follow the paint label. In humid regions or poorly ventilated rooms, give the first coat extra drying time before applying the second coat.
Is ceiling painting safe as a DIY project?
Ceiling painting can be safe for standard-height rooms when you use stable footing, an extension pole, eye protection, and good ventilation. Tall ceilings, stairwells, old textured ceilings, and surfaces that may contain lead-based paint are better handled by trained professionals.
How do professionals paint ceilings with less mess?
Professionals reduce mess by using full-room protection, high-quality roller covers, proper paint loading, extension poles, controlled rolling speed, wet-edge technique, stain-blocking primers when needed, and careful cleanup. They also inspect ceiling materials before sanding or scraping, especially in older homes.
When to Hire a Professional Painter
DIY ceiling painting can work well for standard-height rooms with smooth ceilings and minor color refreshes. Professional help is usually better for:
- Vaulted ceilings.
- Stairwell ceilings.
- Popcorn or heavy texture.
- Water stains.
- Smoke stains.
- Peeling paint.
- Older homes with possible lead paint.
- Large open-plan ceilings.
- Dark ceiling colors.
- Ceilings with skylights, beams, or detailed trim.
A professional crew can also protect the room faster, repair ceiling defects, choose the right primer, and apply consistent coats with less disruption. This is especially useful for busy households, rental turnovers, homes going on the market, or projects that combine ceilings, walls, trim, and cabinets.
To find service availability, visit our national service area page and choose your territory.