By Norman R.
Property owners managing residential or commercial real estate across the United States frequently underestimate the foundational labor required to achieve a flawless interior finish, leading them to search for how to prep a room for painting like a pro. The definitive technical answer is that comprehensive room preparation requires a strict sequence of chemical degreasing, mechanical surface abrasion, structural drywall repair, and geometric masking that consumes roughly seventy percent of the total project timeline. Skipping these critical preparatory phases results in immediate architectural coating failures, including severe paint peeling, visible flashing over patched nail holes, and jagged edge lines along trim moldings. For properties located throughout the various real estate markets of the United States, executing a professional grade preparation layout ensures maximum topcoat adhesion, true color representation, and long term real estate asset equity.
Overview
Relying on premium paint to mask underlying substrate defects is a costly misunderstanding that guarantees early film failure. Modern waterborne acrylic latex paints are engineered to bond with clean, structurally stable profiles, meaning they will readily reject surfaces contaminated with airborne cooking grease, soap residues, or loose drywall dust. Throughout the distinct geographic territories of the United States, buildings handle varying indoor environmental pressures and structural settling cycles. For example, properties in high humidity coastal states experience continuous moisture trapped within the gypsum boards, suburban homes in northern regions suffer from severe interior trim expansion and contraction due to winter heating cycles, and historic urban housing stocks require intensive chemical stabilization over brittle plaster frameworks. Below, we break down the exact mechanical workflows, material specifications, and professional field standards required to prepare your room for a flawless finish.
Quick Reference Room Prep Summary
- Chemical Decontamination Matrix: Washing walls with a trisodium phosphate substitute solution is mandatory to strip away skin oils, kitchen grease, and wax films that block paint adhesion.
- Mechanical Profile Abrasion: Sanding all drywall surfaces with 120-grit to 150-grit aluminum oxide paper breaks old gloss finishes and creates a physical texture for the new paint to grip.
- Structural Defect Remediation: Packing indentations with a professional lightweight setting compound followed by a dedicated polyvinyl acetate primer coat stops suction flashing.
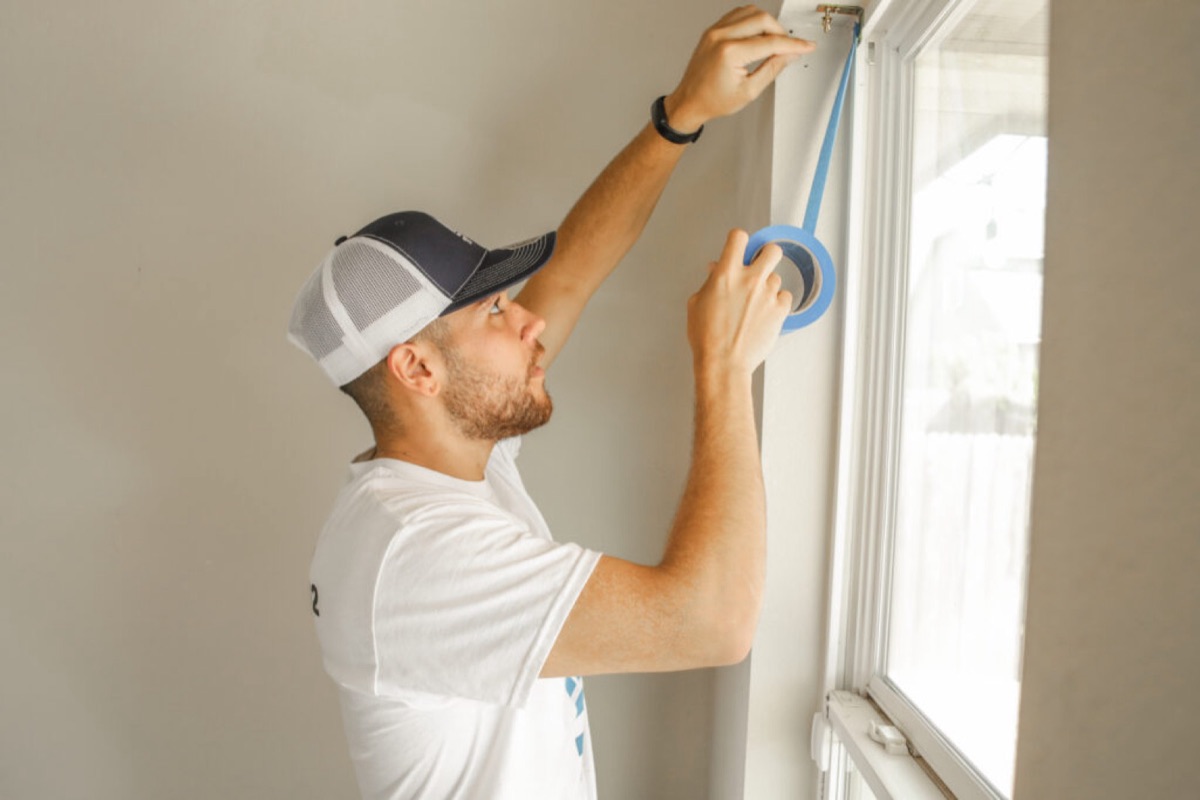
- Geometric Masking Seals: Applying premium painter tape and activating its pressure sensitive adhesive backing prevents liquid paint bleed along baseboards and casing edges.
How to Clean Walls Before Painting
Why Do Invisible Contaminants Trigger Widespread Coating Adhesion Failures?
Drywall partitions across United States homes naturally accumulate a layer of invisible chemical contaminants over years of daily occupancy. In high traffic zones like kitchens, hallways, and living spaces, walls collect airborne cooking oils, localized skin oils around light switches, and microfine household dust. If you skip the cleaning phase and roll a fresh coat of acrylic latex paint directly over these greasy areas, the liquid paint cannot make direct contact with the underlying wall plane.
The paint film will dry on top of the grease layer as a floating, brittle sheet. Within months, minor everyday impacts or cleaning attempts will cause the topcoat to chip, blister, and peel away in large strips because it lacks a true mechanical bond with the substrate. To ensure your investment holds up over time, your preparation workflow must include a complete chemical wash to dissolve these oily barriers before you open a single paint can.
What Is the Technical Execution Checklist for Chemical Decontamination?
To achieve a chemically clean substrate, professional painters avoid generic household detergents, which often leave behind a slick surfactant film that can ruin paint adhesion. Instead, technicians rely on a specialized trisodium phosphate substitute solution mixed with warm water.
First, mix the solution according to manufacturer ratios. Dissolve the concentrated TSP substitute into warm water inside a clean five gallon bucket, wearing protective gloves and eyewear to shield against skin irritation.
Next, execute a bottom up scrubbing protocol. Saturate a heavy duty cellulose sponge in the solution, wring out excess liquid to prevent pooling, and scrub the walls starting from the baseboards working upward to the ceiling line. Cleaning from the bottom up prevents dirty water from running down dry walls and leaving permanent track lines in the drywall paper.
Then, perform a clean water rinse pass. Wipe down the entire wall surface with a separate sponge saturated in fresh, clean water to remove any loosened grime and chemical cleaner residues.
Finally, enforce total substrate dryness windows. Allow the washed room to dry completely for a minimum of twenty four hours, monitoring ambient indoor humidity levels before starting any mechanical sanding work.
Professional Interior Wall Preparation Steps
How Does Pole Sanding Establish a High Adhesion Substrate Profile?
Once the walls are chemically clean and completely dry, the next phase is mechanical surface abrasion. Many DIY installers believe that sanding is only necessary if the wall has rough patches, but professional crews sand every square inch of a room to ensure perfect paint performance. Existing interior paint films naturally build up a slick, hardened skin as they age, especially if the room was originally finished with a satin or semi gloss sheen.
Rolling fresh paint over a slick, unsanded wall provides no grip for the new resin polymers. Pole sanding the entire room with 120-grit or 150-grit sandpaper breaks this smooth surface skin, knocking down old roller texture and micro defects. This mechanical abrasion leaves behind a subtle, uniform profile texture that allows your new paint coat to lock tightly onto the wall, preventing premature wear and chipping.
Why Is Dust Extraction Mandatory Prior to Opening Paint Inventory?
Sanding drywall creates a massive volume of fine, lightweight white dust that quickly settles across your walls, trim work, and floors. This dust poses a serious threat to your final paint finish. If you roll fresh paint directly over a dusty wall, the liquid paint will stick to the loose dust particles instead of the actual wall surface.
As the paint dries, the dust will absorb the liquid binders, creating a rough, gritty texture that looks unpolished and ruins the color consistency. Furthermore, the paint film will be highly prone to peeling because the dust prevents it from bonding with the wall. After finishing your sanding pass, use a heavy duty vacuum equipped with a HEPA filter to clean the entire room. Follow this by wiping down every wall down from top to bottom with a clean, damp microfiber towel to pull away every last bit of dust, a critical baseline step we outline in our master manual on can you use old paint.
Drywall Repair Before Painting
What Structural Materials Stop Suction Flashing Over Patch Work?
Every lived in home across the United States has small wall defects like old nail holes, desk scuffs, or minor stress cracks around door frames. Fixing these flaws requires using a high quality lightweight spackling compound or a professional setting compound applied with a flexible steel putty knife. However, simply filling the hole is only half the battle.
Dried spackling compound is incredibly porous and behaves exactly like a sponge when exposed to liquid. When you apply a raw spackling compound patch to a wall, it exhibits a highly porous behavior. This patch sucks moisture from the wet paint rapidly, which creates a flat, dull visual spot known as suction flashing. This common defect will ruin your color uniformity under raking light, an issue we analyze deeply in our national guide on when to use primer on walls.
How Do You Apply a Polyvinyl Acetate Sealer Over Drywall Repairs?
To stop suction flashing from ruining your fresh interior look, you must apply a dedicated spot coat of polyvinyl acetate (PVA) drywall primer sealer over every patch before rolling your finish paint. This specialized primer contains high volumes of low cost resins engineered to seal porous gypsum and spackling compounds completely.
Using a small brush or a foam applicator, spread a thin, uniform coat of the PVA primer over each dried and sanded repair spot, feathering the edges outward about two inches onto the surrounding painted wall. The primer seals the porous repair, creating a non porous skin that stops the patch from robbing your finish paint of its water content. This step ensures your colored topcoats dry at a perfectly uniform rate across the entire wall plane, allowing your expensive final color to achieve its true sheen, maximum washability, and correct film thickness. For homeowners coordinating total room updates, matching these pristine wall steps with refreshed woodwork is essential to achieve a high end look, a precision workflow we detail in our manual on painting cabinets with doors.
Room Painting Tape Techniques
How Do You Prevent Paint Bleed Under Masking Parameters?
Achieving razor sharp, professional paint lines along baseboards, door casings, and window frames requires mastering advanced geometric masking techniques. Simply sticking painter tape along an edge is not enough to stop liquid leaks. Standard architectural trim work features small wood grain variations and subtle surface dips that create microscopic gaps beneath flat tape.
When you roll fresh paint over these areas, the liquid paint will naturally seep under the tape through capillary action, leaving jagged, messy edges when the tape is pulled away. To prevent this paint bleed, you must press down firmly along the entire edge of the tape using a plastic putty knife or a clean interface tool. This physical pressure activates the tape’s pressure sensitive adhesive backing, molding it tightly into every tiny dip in the wood trim and creating an absolute barrier against liquid seepage.
When Is the Proper Window to Pull Masking Tape Filaments?
A common room preparation mistake is leaving painter tape on the trim for too long after the painting work is finished. If you allow your new acrylic paint film to dry and cure completely over the edge of the tape, the paint resins will chemically link across the tape line, forming a continuous plastic sheet.
When paint dries and cures completely over the tape layout, the resins link directly across the tape line. Pulling dry tape later tears the new paint film, creating jagged, ruined edges along your baseboards. To avoid this frustration, pull your painter tape away while the final coat of paint is still slightly wet, or wait until it has set up but not fully cured, pulling the tape back smoothly at a sharp 45-degree angle away from the painted wall. This clean angle cleanly cuts the wet paint film, resulting in a flawless, razor sharp line that highlights your woodwork beautifully.
National House Construction and Regional Climate Variables
How Do Indoor Relative Humidity Changes Shift Primer Cure Open Windows?
To get a long lasting finish from your painting project, you must align your preparation steps with the specific climate conditions of your local environment. Buildings across different regions of the United States face unique indoor environments driven by regional weather, local humidity shifts, and seasonal HVAC use. These factors directly affect paint drying times and product performance.
In humid coastal locations or during sticky summer months, high moisture levels in the air slow down the paint drying process. Under these conditions, water based PVA primers and lightweight spackling compounds take significantly longer to dry and cure completely. Rushing this window and applying paint over damp patch work traps moisture inside the wall, which can cause early blistering and ruin your finish.
Conversely, in dry desert climates or inside homes running artificial heating during harsh winter freezes, the air is incredibly dry. This low humidity causes spackling compounds to dry very rapidly, which can lead to early shrinking and cracking if the patches are applied too thick. Property owners must monitor these indoor conditions carefully, allowing extra drying time in humid zones and using thin layers in dry climates to ensure the preparation base sets up perfectly.
How Does Architectural Age and Style Direct Material Selection?
The age and building style of your home play a major role in your overall preparation choices and material budgets. Older historic homes across the United States often feature traditional lath and plaster walls rather than modern paper faced drywall panels. Plaster is a dense, highly alkaline material with high pH levels that can easily scorch and destroy standard interior paint resins if left unsealed, a common defect known as lime burn.
When preparing an older historic home for a fresh look, you cannot use a standard drywall primer over raw plaster walls. You must apply a specialized alkali resistant masonry primer sealer engineered to neutralize high pH levels and seal the porous plaster securely.
For modern homes with large open concept layouts, your preparation and painting work must be flawless because long walls flooded with sunlight from large windows will easily reveal every single minor bump or uneven texture. Using a clean layout approach like color drenching helps simplify these expansive rooms, but using proper sanding and priming steps is the only way to ensure your large walls look beautiful and uniform under intense natural light, a design trend we analyze in our national guide to what is color drenching. For older properties with weathered exterior brick elements or indoor accent walls, using proper surface stabilization steps is equally critical to protect your masonry features, as outlined in our technical article on can you clean limewashed brick.
Room Preparation Production Performance Index
Review this database reference index to verify that your room preparation steps match your specific wall conditions and application tools prior to starting your painting work.Substrate Defect ProfilePrimary Chemical DefectRecommended Preparation SystemOptimal Prep ToolPrimary Production GoalHousehold Grease & FingerprintsSlick Surface Adhesion BlockTSP Alternative Solution WashHeavy Cellulose SpongeRemoves surface oils to ensure a tight paint bond.Slick Old Satin or Semi-Gloss PaintLow Mechanical Profile TractionFull Surface Pole Sanding Pass120-Grit Aluminum Oxide PaperBreaks the glossy surface skin to create paint traction.Deep Drywall Dents & HolesHigh Suction Flashing RiskLightweight Spackling CompoundFlexible Steel Putty KnifeFills wall indentations flush with the surrounding plane.Freshly Sanded Repair PatchesHigh Porosity Paint AbsorptionPolyvinyl Acetate Primer Sealer3/8 Inch Microfiber Roller SleeveSeals porous compound patches to ensure uniform topcoat sheen.Loose Trim Work SeamsAir Infiltration & Visual GapsElastomeric Acrylic Caulk LineSmooth Trowel Finger ApplicationSeals open joints between walls and trim with a flexible bond.
FAQs
Can you use standard dish soap to clean your walls before painting?
No, using standard liquid dish soap to wash your walls before painting is not recommended by professional crews. Retail dish soaps are formulated with specialized moisturizing agents, oils, and artificial scents designed to protect skin during use. These ingredients leave behind a slick chemical film on your walls that is very difficult to rinse away completely. This leftover film blocks your new paint from bonding with the drywall, leading to widespread peeling and blistering problems later. Always use a dedicated trisodium phosphate substitute solution to ensure a clean, residue free surface.
How long do you need to wait for drywall spackle to dry before sanding?
Under standard indoor room conditions with low humidity, typical lightweight spackling compounds dry enough for light sanding in roughly one to two hours for small nail holes. However, if you are filling deeper dents, structural drywall cracks, or large anchor holes, the compound requires a longer drying window of twelve to twenty four hours to cure completely. Sanding spackling compound before it has dried all the way through will cause the damp material to clump up, tearing the patch out of the wall and forcing you to reapply the material.
What happens if you skip sanding your walls before rolling paint?
Skipping the full surface sanding phase before rolling paint results in a low quality finish that is highly prone to early peeling. Existing wall coatings naturally harden into a smooth skin over time, especially if the room has an old satin or semi gloss finish. New latex paint requires a subtle, textured profile to grip onto the wall mechanically. Rolling paint over a slick, unsanded surface means the new layer cannot find traction, causing it to scratch easily and peel away when bumped by furniture or vacuums.
Should you remove your painter tape before or after the paint dries?
You should always pull your painter tape away while the final topcoat of paint is still slightly wet, or wait until it has set up but not fully dried. If you allow your new paint film to dry and cure completely over the tape line, the acrylic resins will form a continuous plastic sheet across the tape edge. Pulling the tape away after the paint has fully hardened will tear the paint film along the wall, leaving behind jagged, ruined lines. Pull the tape back slowly at a sharp 45 degree angle to get a perfect line.
Do you need to prime an entire room if the old color is light?
No, you do not need to prime every wall in an entire room if the existing paint is a light color, is in clean condition, and you are applying a similar neutral tone. You only need to execute a spot priming pass over fresh drywall patches, raw joint compound repairs, or stubborn household stains to stop suction flashing and bleeding. However, if the old paint is a dark color like deep blue or red, or if the surface is slick oil based enamel, you must apply a full coat of primer over all the walls to ensure proper color coverage and adhesion.
According to structural research verified by the Master Painters Institute (MPI), completing thorough surface preparation and applying the correct primer system is essential for achieving a durable, high quality interior finish. Ready to completely upgrade your residential or commercial real estate asset with a gorgeous, high performance finish executed by a trained professional crew? Reach out to the expert national team at That 1 Painter today by visiting our main site to schedule your detailed, obligation free on site project estimate, and take the stress out of your next home improvement project.