By Robert R.
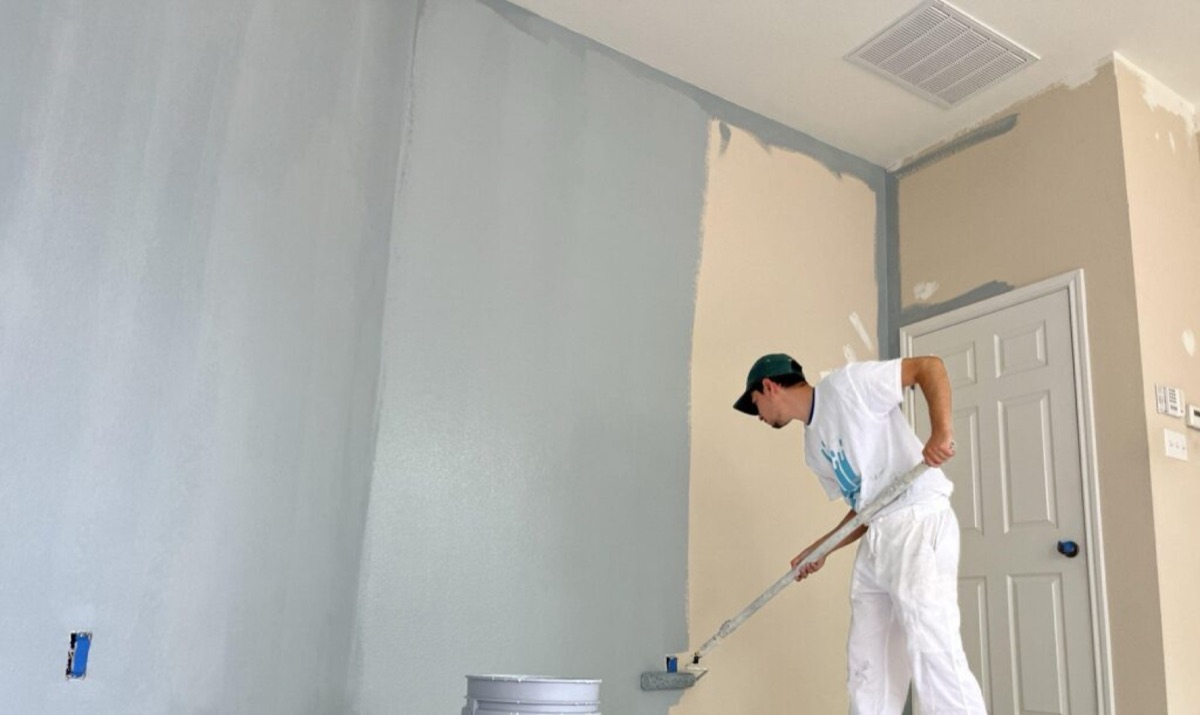
Property owners managing residential or commercial real estate across the United States regularly demand high performance finishes during a renovation layout, leading them to ask how many coats of paint do you really need. The definitive technical answer is that you absolutely need two full coats of paint over a properly prepared substrate to guarantee uniform color representation, accurate sheen alignment, and long term surface washability. Attempting to save money on materials by applying a single coat results in rapid coating failure, including visible roller tracks, uneven patch absorption, and poor film durability. For properties throughout various climate zones, adhering to the structural two coat standard establishes the correct dry film thickness required to protect your drywall investment and build lasting real estate asset equity.
Overview
Skipping the critical second layer to compress your home improvement timeline always backfires into higher overall operational expenses. Raw plaster panels, high contrast underlying pigments, and patched wall areas interact poorly with thin, single layers of waterborne latex coatings, causing widespread aesthetic issues that extra touch ups cannot resolve. Throughout different geographic territories, buildings face distinct internal environmental stresses and structural shifting patterns. For example, properties in high humidity coastal states experience continuous moisture stress that softens thin paint films, homes in northern states face cyclical heating dryouts that crack weak layers, and older housing stocks require heavy, uniform build rates over historic lath and plaster walls. Below, we break down the exact mechanical chemical processes, substrate variables, and professional field standards required to determine exactly how many coats of paint your room demands.
Quick Reference Summary
- Standard Interior Walls: Achieving a professional grade finish on normal drywall layouts requires exactly two full coats of premium acrylic latex paint to build a complete protective barrier.
- Raw Substrate Rules: New, unpainted drywall sheets and fresh joint compound patches demand one dedicated sealer coat followed by two full coats of finish paint.
- High Contrast Transitions: Moving from deep, dark color codes to bright, light color choices requires a high hide primer layer plus two separate topcoats to block underlying pigments.
- Maintenance Touch Up Exception: Applying a single coat is only acceptable when refreshing an identical color code over a clean wall surface that has no bare patches or structural repairs.
Why Is Dry Paint Film Thickness Crucial?
The durability of an architectural coating depends entirely on the physical thickness of the film left behind after the liquid solvents completely evaporate from the wall surface. In the professional house painting industry, this metric is split into wet film thickness (WFT) and dry film thickness (DFT). When a painter rolls a layer of premium interior acrylic latex paint onto smooth drywall, they must apply the liquid at a consistent wet thickness of roughly 4.0 mils (where one mil equals one thousandth of an inch).
As the water content inside that wet layer evaporates into the room during the drying process, the volume of the paint layer shrinks significantly. Premium paints generally feature a volumetric solids content of roughly 35 percent to 40 percent, meaning that a 4.0 mil wet layer will shrink down to a dry film thickness of just 1.4 to 1.6 mils when fully cured. If an installer spreads the wet paint too thin, trying to stretch a single gallon across an entire large room, the resulting dry layer will fall below 1.0 mil. A layer that thin lacks the physical substance to resist everyday scuffs, meaning the paint will readily rub off the wall during routine cleaning.
How Does Acrylic Latex Paint Dry?
When paint dries, it undergoes a complex chemical transformation called polymer coalescence. Acrylic latex paint consists of microscopic plastic resin spheres suspended uniformly within a water emulsion. When the liquid is rolled onto a substrate, the water molecules begin to leave the film. This evaporation forces the individual acrylic spheres closer together until they touch.
Once the spheres touch, they chemically fuse together into a continuous, tightly knit plastic sheet that blocks water and oils. A single coat of paint almost always contains tiny pinholes where the shrinking resins failed to meet perfectly. Applying a second coat of latex paint fills these microscopic gaps completely, sealing the surface. This second layer creates a tough, hydrophobic shield that allows property managers to scrub away stubborn messes like dirt, grease, and fingerprints without wearing down the paint or altering its sheen profile.
Do You Need Primer for Drywall Installation?
Many property owners wonder if they can bypass using a separate primer by simply rolling three coats of standard colored wall paint onto a newly installed wall. This approach is a misuse of materials that leads to poor visual outcomes. A raw, unpainted drywall partition consists of paper faced gypsum panels joined together by highly absorbent joint compound seams.
If you apply a premium acrylic finish paint directly over this raw surface, the joint compound sections will rapidly suck the water out of the wet coating. This high absorption ruins the paint’s natural leveling process, causing the resins to set unevenly. This defect, known as suction flashing, leaves your finished wall with flat, dull lines along every taped joint and nail head, a structural issue we analyze deeply in our national guide on when to use primer on walls. Applying a dedicated polyvinyl acetate (PVA) drywall primer first seals these pores completely, building a uniform foundation that ensures your subsequent finish coats achieve a perfectly even sheen across the room.
How to Kill Mold Before Painting Walls?
Certain household wall blemishes cannot be covered by standard interior paints, no matter how many coats you apply. Common stains like water rings from old roof leaks, soot from stone fireplaces, kitchen grease splatters, and dark wood tannins are highly water soluble.
When you apply a standard water based latex paint over these areas, the water inside the wet paint dissolves the stain pigments immediately. As the coating dries, the dissolved oils migrate upward through the wet film, settling permanently on the face of your fresh coat. To stop this pigment migration, you must apply a dedicated coat of an oil based or shellac based stain blocking primer sealer. These specialized sealers cure into a dense barrier that traps blemish molecules beneath a hard plastic layer, stopping black mold or chemical stains from bleeding into your finish coats, an essential preparation rule we outline in our resource on remediating household mold walls.
How Do I Eliminate Paint Roller Tracks Overlap?
Achieving a uniform flat or satin wall finish depends directly on the quality of your application tools. Premium interior house paints are formulated with high percentages of volumetric solids, giving them a thick fluid viscosity. Trying to apply these heavy coatings with cheap, thin woven roller covers will lead to an uneven finish, heavy track lines, and visible lap marks across your room.
Professional crews apply high solids coatings using premium microfiber or non shedding woven roller covers. Microfiber sleeves are built with thousands of tiny, split synthetic fibers that hold a massive volume of paint and release it evenly across the wall under light pressure. This uniform release prevents excess product from squeezing out of the sides of the roller frame, eliminating the sharp edge lines that cause tracking, an essential field technique we outline in our manual on eliminating paint roller tracks.
When cutting in the perimeter of a room along baseboards, crowns, and corner junctions, your paintbrush configuration directly alters your final film leveling. Low cost paintbrushes made with coarse, stiff nylon bristles apply uneven pressure across the wet film, cutting deep channels into the coating that remain visible after drying. Experienced painters use professional sash brushes made with chemically tipped polyester filaments that feature a distinct structural taper. These soft, split tips hold a large paint reservoir and release it smoothly under light, uniform pressure. This smooth release allows the liquid acrylics to flow together seamlessly, eliminating brush tracks before the drying window closes. For a detailed look at achieving smooth finishes on modern woodwork, check out our operational guide on fine finish cabinet painting steps.
How Do I Prep My Walls for Painting?
Securing a flawless finish requires structured technical steps and proper tools. When organizing a comprehensive interior painting service, using these field tested professional methods ensures an exceptional bond and eliminates costly mistakes.
- Enforce Strict Box Mixing Procedures for Color Uniformity: Retail paint tinting machinery can vary slightly from one gallon can to the next, which can cause minor color shifts across your room walls. To prevent this, always box your paint by pouring all your gallons of the same color into a single large five gallon bucket and stirring them together thoroughly. Boxing your paint ensures your color remains perfectly uniform from the first wall to the last corner.
- Maintain a Continuous Wet Edge to Eliminate Lap Lines: Never allow the perimeter of your painted section to dry out before rolling into the adjacent field. Work systematically in three foot wide vertical blocks, rolling fresh paint back into the wet edge of your previous pass. This technique allows the separate rows to flow together seamlessly, stopping the formation of thick, double layered lap lines.
- Execute a Final Unloaded Laying Off Pass Across Wet Fields: As soon as you finish rolling a vertical section of the wall, lift your roller frame and return to the top of the ceiling line. Hold the roller lightly against the wall without adding fresh paint, and pull it straight down to the baseboard in one continuous motion. This light, single directional pass flattens out any remaining ridges, ensuring the paint dries into a uniform finish.
- Track Substrate Dryness with a Pinless Moisture Meter: Applying water based latex coatings over damp substrates traps moisture inside the wall cavity, leading to blistering and peeling. Before opening your paint cans, use a pinless moisture meter to verify that the internal drywall moisture levels have dropped below 12 percent, especially in high risk areas like kitchens and bathrooms.
How Do Regional Weather Conditions Influence Indoor Paint Drying?
To get a long lasting finish, you must align your project steps with the climate conditions of your local environment. Buildings across different regions face unique indoor environments driven by regional weather, local humidity shifts, and seasonal HVAC use. These factors directly affect paint drying times and product performance.
In humid coastal locations or during sticky summer months, high moisture levels in the air slow down the evaporation process. While an interior acrylic paint layer may feel dry to the touch in an hour, it can take up to four hours before it is cured enough to handle the mechanical stress of a second coat. Rushing this window and rolling fresh paint over a partially cured first layer will tear the setting resins, leaving behind a rough texture and ruining the finish. Conversely, in dry desert climates or inside homes running artificial heating during harsh winter freezes, the air is incredibly dry. This low humidity causes water based paints to dry very rapidly, requiring the addition of specialized conditioners to slow down evaporation and keep the wet edge workable.
The age and building style of your property also play a major role in your overall preparation choices and material orders. Older historic homes across the United States often feature traditional lath and plaster walls rather than modern paper faced drywall panels. Plaster is a dense, highly porous material that expands and contracts differently than drywall, which frequently leads to minor stress cracks along windows and doors as the foundation settles over time. Plaster surfaces absorb water from coatings rapidly, requiring extra material to build a stable film. When working on a historic home restoration, you must separate your plaster repair areas from your standard drywall sections to ensure you apply the correct primers and calculate your material needs accurately.
For modern homes with large open concept layouts, your application work must be flawless because long walls flooded with sunlight from large windows will easily reveal every single minor bump or uneven texture. Using a clean layout approach like color drenching helps simplify these expansive rooms, but using proper sanding and two coat painting steps is the only way to ensure your large walls look beautiful and uniform under intense natural light, a design trend we analyze in our national guide to modern color drenching trends.
Substrate Paint Requirement Index
Use this database table to determine the exact number of primer and finish coats required for different interior substrate profiles.Interior Substrate ProfileCurrent Surface ConditionRequired Primer CoatsRequired Paint CoatsPrimary Material Performance GoalNew Bare Drywall SheetsRaw Paper and Joint Plaster1 Full PVA Coat2 Full Acrylic CoatsEqualize absorption and stop joint ghosting.Previously Painted WallClean, Same Color Layout0 (None Required)1 Touch Up CoatRefresh surface freshness and restore sheen.Previously Painted WallHigh Contrast Color Change1 High Hide Coat2 Full Acrylic CoatsNeutralize dark pigments and build true color.Water Stained Ceiling PanelsActive Brown Water Ring1 Solvent Barrier Coat2 Full Acrylic CoatsBlock soluble pigments from bleeding through.Glossy Alkyd Wood TrimHigh Sheen Oil Enamel1 Acrylic Bonding Coat2 Satin Trim CoatsCreate a mechanical grip to prevent chipping.
FAQs
Can you achieve proper paint coverage with a single heavy coat?
No, trying to apply a single, extra thick coat of paint to skip a step will cause multiple surface defects. Paint is engineered to dry within a specific wet thickness range, usually between 4.0 and 5.0 mils per coat. If you apply the liquid too thick, the top surface of the film will dry and shrink rapidly while the paint underneath remains wet, leading to sagging, mud cracking, and widespread blistering across your walls.
How long do you need to wait before applying a second paint coat?
For standard interior acrylic latex paints under normal room conditions, you should wait a minimum of two to four hours before applying your second coat. Even if the wall feels dry to the touch sooner, the resin binders need this time to release their water content and begin the chemical cross linking process. Rushing this curing window can cause your roller to pull the soft first coat right off the wall, ruining your finish texture.
Why does a wall look patchy after the first coat of paint dries?
A patchy look after the first coat of paint is normal and indicates uneven absorption across the underlying wall surface. Sections of raw drywall compound or fresh spackling patches absorb the moisture from your paint much faster than areas that already have old paint. This variation leaves behind inconsistent sheen levels and light spots. Applying a second full coat builds a uniform thickness, creating a consistent color and hiding any blotchy areas.
Do you need to prime your walls if you buy a self priming paint?
Retail self priming paints or paint and primer in one mixtures are simply thick versions of standard interior latex paint with high viscosity levels. They do not contain the specialized polyvinyl acetate or stain blocking resins found in dedicated primers. While they provide excellent hiding power when you are changing colors over clean, previously painted drywall, they cannot seal raw joint compound, fuse to glossy oil trim, or block stubborn water stains effectively.
What is the maximum number of paint coats you can apply to drywall?
There is no strict maximum number of paint coats a drywall panel can handle, provided each layer is allowed to dry and cure completely before the next is applied. However, applying more than three or four coats during a single project provides no extra durability benefit and simply wastes expensive materials. If you need more than two coats to achieve full color depth, it usually means your paint is low quality or you failed to use a tinted primer sealer first.
According to technical engineering research verified by the Master Painters Institute (MPI), applying two separate coats of premium paint over a properly prepared and primed surface is essential for achieving a durable, high quality finish. Ready to completely upgrade your residential or commercial real estate asset with a gorgeous, high performance finish executed by a trained professional crew? Reach out to the expert national team at That 1 Painter today by visiting our main site to schedule your detailed, obligation free on site project estimate, and take the stress out of your next home improvement project.