By Norman R.
Property owners managing residential or commercial real estate investments across the United States frequently confront unsightly structural blemishes that compromise their building envelopes, leading them to ask: how do I fix cracked or peeling paint? The definitive technical answer is that repairing a failing architectural coating requires identifying and eliminating the underlying root cause of the failure, such as hidden water vapor leaks or chemical incompatibility, followed by thorough mechanical scraping down to a sound substrate, edge feather-sanding, patch stabilization, and the targeted application of a high-solids bonding primer before applying matching topcoats. Simply brushing fresh latex paint over a flaking, loose boundary layer results in an immediate project failure because the tension of the new paint as it shrinks during film polymerization will pull the loose lower layers straight off the wall. For real estate assets throughout the diverse territories of the United States, implementing a structured, professional-grade coating restoration protocol ensures structural longevity, maintains absolute aesthetic appeal, and protects long-term property equity values.
Overview
Bypassing standard substrate stabilization workflows before launching an interior or exterior paint refresh triggers widespread coating delamination that premium finishes cannot disguise. Architectural coatings degrade due to a combination of mechanical stresses, moisture dynamics, and poor surface preparation. Across the distinct geographic climate zones of the United States, homes deal with varying environmental pressures and seasonal property maintenance cycles. For instance, tightly insulated modern homes in cold northern states experience high winter humidity imbalances that trap warm water vapor behind bathroom ceilings, causing paint to blister. Traditional properties in hot, humid southern markets battle exterior wood siding movement from intense summer rainstorms, and coastal properties handle constant airborne salt-spray humidity that causes metal or fiberglass cores to rust and degrade. Below, we break down the underlying physics of coating failures, advanced equipment configurations, and professional field steps required to repair cracked or peeling paint with absolute certainty.
Quick Reference Paint Failure Repair Summary
- Isolate and Cure the Root Cause: Stop the repair cycle from failing prematurely by identifying and fixing all moisture entry points, plumbing leaks, and structural water damage first.
- Aggressive Mechanical Scraping: Remove every square inch of loose, unbonded, or bubbling paint film systematically using a sharp tungsten-carbide pull-scraper down to a stable substrate.
- Precision Edge Feathering: Use 120-grit to 220-grit sandpaper to sand down the sharp edges of the remaining sound paint layers until they blend perfectly flat into the bare wall zone.
- High-Solids Adhesion Priming: Apply a dedicated layer of oil-based, shellac, or high-adhesion synthetic primer to lock down raw drywall paper, plaster patches, and tannin-heavy timbers securely.
The Scientific Mechanics of Coating Failure Analysis
Why Do Drywall and Wood Substrates Reject Paint Films?
To understand why an architectural paint layer cracks, splits, or peels away from a wall, you must look at the physical forces controlling material adhesion. Paint is not an impenetrable sheet glued permanently to your home; it is a thin, semi-porous polymer membrane that locks onto a wall by building thousands of microscopic mechanical bonds inside the surface pores. If these bonds are disrupted by contaminants or structural movement, the film lifts away from the base material.
According to technical performance standards monitored by the Master Painters Institute (MPI), paint failures usually stem from moisture or chemical incompatibility. For example, applying a modern water-based acrylic topcoat directly over an old, high-gloss oil enamel without scuff-sanding creates a chemical mismatch. The waterborne acrylic cannot bite into the slick oil skin. As it dries and shrinks, it pulls away from the wall, leaving long cracks that look like alligator skin. This mechanical failure can appear on any unprimed woodwork, a major issue we analyze in our technical overview on can you use old paint.
The Hidden Impact of Capillary Water Vapor Pressure
The leading cause of severe paint blistering and peeling across American properties is hydrostatic and capillary vapor pressure. Water vapor inside a home constantly moves toward cold outer walls through a natural process called vapor drive. If an exterior window seam or an indoor bathroom lacks a proper tight seal, moisture slips straight into the underlying drywall or wood siding matrix.
When seasonal weather changes heat up the walls, this trapped liquid water expands rapidly into a gas state. The rising vapor pressure pushes outward from behind the paint film, breaking the microscopic polymer bonds. This expansion lifts the paint away from the wall in large, fluid-filled bubbles or dry, flaking pockets. If you skip fixing the leak and paint over the blistered area, the vapor pressure will return during the next humid weather window, destroying your new topcoats. Ensuring a dry base requires a clean layout, a vital prep standard we provide through our comprehensive national interior painting services.
Pro Tip 1: The Cross-Hatch Adhesion Stability Field Test
Field-trained house painting crews evaluate whether an old paint coat is stable enough to hold a new layer by completing a cross-hatch tape adhesion test. Squeeze a sharp utility knife through the existing paint down to the bare drywall or wood, cutting an eleven-line grid pattern with intersecting slices spaced one millimeter apart. Press a strip of specialized high-tack testing tape firmly over the sliced grid, smooth it down with a squeegee, and pull the tape back quickly at a sharp 90-degree angle. If more than five percent of the small paint squares pull away on the tape, the existing coat is structurally unstable and must be completely stripped away down to the bare wall before applying new paint.
Step-by-Step Professional Repair Workflows
Phase 1: Aggressive Mechanical Scraping and Decontamination
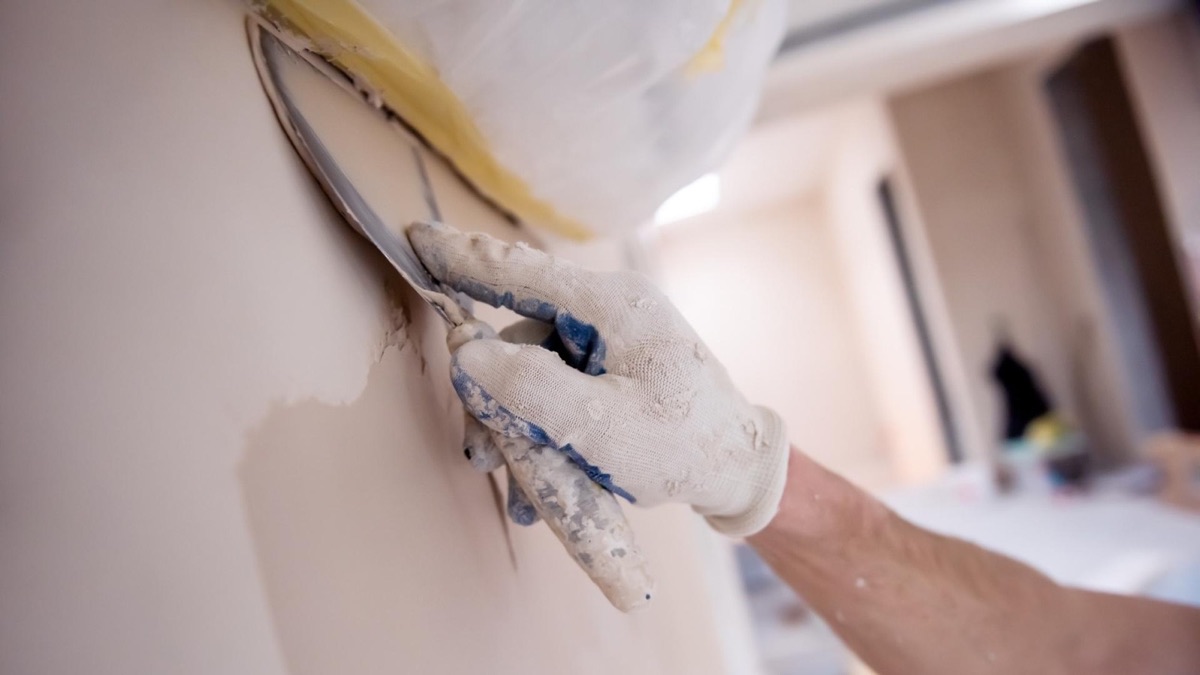
Once you fix the root cause of the moisture leak, the mechanical restoration phase begins. Professional crews avoid cheap, thin steel putty knives, which lack the rigidity to slice through tough paint layers and can leave deep gouges in soft drywall. Instead, technicians deploy heavy-duty scrapers fitted with double-edge tungsten-carbide pull blades.
Pull the carbide blade firmly along the failing wall sections, working from the center of the peeling area outward until you hit sound paint that resists the blade. This process ensures you strip away every hidden pocket of unbonded paint. After scraping away the loose chips, wash the bare substrate thoroughly with a solution of trisodium phosphate (TSP) substitute and warm water. This deep wash strips away invisible contaminants like airborne cooking oils, soap residues, and mildew spores that block adhesion. Wipe the partitions down with a damp sponge and let them dry fully for twelve hours.
Phase 2: Precision Edge Feather-Sanding Protocols
Scraping away loose paint leaves a jagged, multi-layered crater on your wall, where the bare substrate sits noticeably lower than the remaining layers of old paint. If you paint straight over this rough crater, your new topcoat will highlight the uneven drop-off line under bright natural light, a visual flaw known in the trade as shadowing.
To eliminate this line, execute a careful feather-sanding pass. Use an orbital sander or a hand sanding block equipped with 120-grit aluminum oxide sandpaper to sand the sharp edges of the remaining old paint down at a soft slope toward the bare wall. Gradually switch to finer 220-grit sandpaper as you smooth the edge transition. Run your bare fingers across the boundary line; you should feel a perfectly smooth, seamless transition with no sharp steps or ridges before opening your patch compound, an essential smoothing pass we outline in our master manual on eliminating paint roller tracks.
Pro Tip 2: The Two-Pass Chemical-Setting Matrix
When filling deep paint craters on interior partitions, professional painters avoid generic, air-drying premixed spackling compounds sold in retail home centers. Premixed compounds contain high water volumes that shrink excessively as they dry, causing the patch to crack and pull away from the wall. Professional crews patch deep craters using chemically setting joint compounds, such as Easy Sand 45 or 90. These compounds cure through a rapid chemical reaction rather than simple evaporation, ensuring zero shrinkage, maximum structural density, and excellent resistance to cracking even when applied in thick layers over deep holes.
Phase 3: Substrate Patching and High-Adhesion Priming
Mix your chemically setting joint compound according to the manufacturer’s technical specifications, and pack the smooth crater field evenly using a flexible six-inch steel taping knife. Hold the steel blade at a soft 30-degree angle against the wall, and pull it firmly across the patch to skim away all excess material, leaving the compound flush with the surrounding paint borders. Let the patch set up completely for forty-five minutes, sand it perfectly level using a fine 150-grit sanding pole pass, and vacuum away all microfine white dust with a HEPA filter vacuum.
A common mistake that ruins drywall repairs is applying finish wall paint directly over a fresh plaster patch. Raw spackling compounds behave exactly like a porous sponge, absorbing water from wet paint rapidly. This rapid fluid loss ruins the paint’s natural self-leveling process, leaving behind flat, dull, blotchy patches along your repairs, a defect known as suction flashing. To lock down the patch securely, apply a dedicated coat of a high-solids, low-VOC polyvinyl acetate (PVA) primer sealer or a high-adhesion synthetic primer like Zinsser Peel Stop. This primer seals the porous patch completely, building a uniform foundation that allows your colored topcoats to lay down perfectly from corner to corner, a professional prep standard we detail in our master guide on when to use primer on walls.
Pro Tip 3: Wet-to-Dry Film Thickness Verification
To ensure your repaired wall section achieves its maximum durability and intended wash resistance, you must control your material application rates precisely. Professional painting crews check their paint layers continuously using stainless steel wet film thickness (WFT) notch gauges. When rolling your final colored topcoats over a repaired zone, ensure the wet paint film measures a consistent 3.5 to 4.0 mils per coat. This controlled layout guarantees that as the liquid carrier evaporates, the remaining solids build a dry film thickness (DFT) that satisfies strict manufacturer warranty specifications and prevents early paint cracking.
How Do Regional US Climates Modify Your Repair Strategy?
Managing High Coastal Moisture Traps and Deep Winter Freezing
To ensure your wall repairs hold up beautifully over time, your painting crew must align their preparation steps with the climate conditions of your region. Home interiors across different regions of the United States face unique indoor and outdoor lighting environments driven by regional weather patterns, local humidity shifts, and seasonal HVAC use. These factors directly affect paint drying times and product performance.
In humid coastal regions or during sticky summer months, high moisture levels in the air slow down the paint drying process significantly. When repairing walls in these environments, choosing high-adhesion synthetic primers is essential, as they can cure reliably even under damp conditions.
Conversely, for properties in northern states facing harsh winter freezes, interior repairs must be completed with the windows closed to keep out the cold. Running indoor heating loops creates a dry environment that dries paint quickly, but the lack of fresh air exchange limits the available oxygen in the room. Professional crews use running fans to keep air moving across the ceilings and walls, ensuring the paint layers receive a steady supply of oxygen to complete their curing cycle cleanly, a high-end standard we provide across our comprehensive national lines.
How Home Age and Architecture Guide Your Repair Choices
The style and age of your home play a major role in your overall preparation choices and material budgets. Older historic homes across the United States often feature traditional lath and plaster walls rather than modern paper-faced drywall panels. Plaster is a dense, highly porous material that expands and contracts differently than drywall, which frequently leads to minor stress cracks along window frames and door headers as the foundation shifts over time. Plaster surfaces absorb water from coatings rapidly, requiring a dedicated alkali-resistant primer coat to stabilize the wall before painting.
When preparing an older property with weathered masonry accents or historical trim features, using proper surface stabilization steps is critical to protect your walls, as outlined in our technical article on can you clean limewashed brick. For modern homes with large open-concept layouts, your paint application must be flawless because long walls flooded with sunlight from large windows will easily reveal every single minor bump or uneven texture.
Using a clean layout approach like color drenching helps simplify these expansive rooms, but using proper sanding and two-coat painting steps is the only way to ensure your large walls look beautiful and uniform under intense natural light, a professional standard we provide through our comprehensive national cabinet painting service and trim restoration lines, as detailed in our guide on what is color drenching.
Substrate Repair and Material Specification Index
Review this database reference matrix to match your specific failing substrate material with the correct professional scrapers, patch compounds, and primers required to prevent coating failures.Failing Substrate ProfilePrimary Paint Failure CauseRecommended Scraper ToolRecommended Patch CompoundRecommended Primer SealerInterior Drywall PanelsHigh Humidity Suction Flashing2.5-Inch Rigid Steel BladeChemically Setting Joint CompoundLow-VOC PVA Drywall SealerOld Lath & Plaster WallsAlkaline Scorching & ChalkingTungsten-Carbide Pull ScraperHigh-Density Plaster WashAlkali Resistant Acrylic PrimerExterior Cedar SidingActive Wood Tannin BleedHeavy-Duty Contour ScraperExterior Elastomeric Wood PatchOil-Based Alkyd Wood PrimerGalvanized Exterior SteelFlash-Rust Oxidation PocketsStiff Wire Wheel Brush PassHigh-Strength Epoxy Metal FillerZinc-Chloride Anti-Rust PrimerKitchen Trim WoodworkAccumulated Mopping Grease OilsChiseled Oval Shave HookPremium Structural Acrylic PasteHigh-Adhesion Synthetic Primer
FAQs
Why does a paint color that looked gray in the store look purple on my walls?
A paint color can look completely different on your walls because of an optical shift called metamerism. Commercial paint stores use harsh fluorescent light tubes that lack a full spectrum of color wavelengths, hiding subtle undertones. When you bring that paint home and apply it over a drywall partition under warm home LEDs or natural sunlight, the real secondary pigments pop out, instantly shifting your clean gray into a noticeable blue or purple tone. Always test colors inside the actual room before painting, as detailed in our guide on how to choose the right paint color without swatches.
Can you use a standard interior wall paint to coat an exterior wood trim piece?
No, you should never use standard interior wall paint to coat an exterior trim piece. Interior paints are engineered to be highly flexible and porous so indoor rooms can breathe, but they lack the physical hardness, UV blocks, and water-repelling ingredients needed to withstand outdoor weather. Using interior paint on exterior wood will cause the film to soften quickly under sunlight, fade rapidly, turn sticky, and peel away within weeks of exposure.
Do you need to scrape away old paint if it is cracked but not peeling yet?
Yes, you must scrape away and stabilize any cracked paint films even if they are not actively peeling or flaking off the wall yet. Open cracks mean the old paint film has lost its internal flexibility and has separated from the substrate. If you paint straight over these cracks, the moisture inside your new wet paint will seep into the openings, swelling the lower layers and causing the entire coating system to lift and peel away shortly after your project is completed.
Why does painter’s tape sometimes leave jagged, messy edges when pulled away from wood trim?
Painter’s tape will rip fresh paint off your walls if the tape was left on the wall for too long after application, or if the underlying paint layer suffered from weak adhesion due to poor surface preparation. If you allow your new paint film to dry and cure completely over the tape edge, the acrylic resins will form a continuous plastic sheet across the tape line. Pulling dry tape away later tears the hardened paint film along the wall. Always pull your painter’s tape away while the final topcoat is still slightly wet, pulling at a sharp 45-degree angle.
How many hours must you wait for a fresh plaster patch to dry before applying primer?
The required drying time before you can safely prime a plaster patch depends on the specific type of compound used, but standard lightweight spackling compounds require a wait time of 12 to 24 hours to dry completely. However, modern chemically setting joint compounds cure through a chemical reaction rather than simple evaporation, allowing you to scuff-sand and apply your primer sealer after just 45 to 90 minutes. Always verify that the patch feels completely dry and hard before priming.
Ready to Stabilize and Restore Your Home’s Finish with Flawless Professional Care?
Repairing cracked or peeling paint layers with an advanced, high-adhesion coating system executed by a trained professional crew is the fastest way to protect your investment and dramatically boost your real estate value. Don’t risk messy lines, flashing patches, or premature paint peeling on your home’s finest architectural features.
Reach out to the expert national team at That 1 Painter today to schedule your detailed, obligation-free on-site project estimate, and give your property the beautiful, long-lasting protection it deserves.
Book Your Free Structure Estimate Now